Recipe for a Patriotic Cheesecake Tart
You don’t need a reason to celebrate to make this delightful BBQ dessert recipe, however, this Patriotic Cheesecake Tart is not only easy to make but looks stunning and tastes amazing. A classic cheesecake recipe fills an unexpected, bright red, shortbread crust and is topped with delicious, in-season berries. Add some stabilized whipped cream for even more pizzazz. While whipping this out on a special occasion like Memorial Day or Canada Day would be quite fitting, this dessert made on the grill is perfect for just about any time of year.
Recipe for a Patriotic Cheesecake Tart
PrintIngredients
Method
Photos
Shortbread Crust:
1¼ cups
flour
1/3 cup
granulated sugar
2 tbsp.
unsweetened cocoa powder
½ cup
cold salted butter, cubed
1 tbsp.
red food coloring or red gel coloring as needed
Cheesecake Filling:
16 oz, 2 bricks
cream cheese, room temp, cubed
1 cup
sour cream
¼ cup
sugar
2 tbsp.
flour
2
eggs, room temp
1 tsp.
vanilla extract
1
lemon, zested
Toppings/Stabilized Whipped Cream:
1 pint
strawberries, washed
1 pint
blueberries, washed
1 cup
whipping cream
1 tbsp.
cornstarch
1 tsp.
vanilla extract
1/8 tsp.
blue gel food coloring (optional)
- Start with the shortbread crust. You can easily and quickly do this in a food processor or use a pastry blender or a pair of knives to do this. Combine the flour, sugar and cocoa powder. Add the butter and red food coloring, pulsing the food processor until the mixture comes together in a sandy-clumpy fashion. You may need to add more red food coloring to the mixture to achieve the red you desire.
- Press the mixture into a tart pan and all the way up the sides. Use a cup or something flat to make sure everything is even. Prick the crust with a fork, without going all the way through, then chill in the fridge or freezer until the grill is heated.
- Preheat the barbecue to 425°F, preparing for indirect heat. Place a baking stone or two onto the barbecue to preheat with the grill.
- Bake the tart crust on the baking stone for up to 15 minutes, then let it rest while you make the filling.
- Reduce the temperature of the barbecue to 350°F, leaving the baking stone in there.
- Using a stand mixer or hand mixer, combine the cream cheese and sour cream. Add the sugar, flour, lemon zest, vanilla and the egg, mixing until fully combined. Be careful not to overmix, the fewer air bubbles, the less opportunity for the batter to crack while baking.
- Pour the batter into the cooled tart crust. Place the cheesecake on the baking stone and add a bowl of hot water in a heat-safe dish nearby. Bake the cheesecake for 30 to 35 minutes or until set but the center is still a little jiggly. Remove the cheesecake from the barbecue and allow it to cool to room temperature before chilling it for at least 4 hours before removing the outer tart pan to move the cake to a serving platter.
- To make the stabilized whipped cream topping, chill a bowl and the beaters of a hand or stand mixer for at least 15 minutes before starting. Measure 1 cup of cold whipping cream into the bowl and begin beating. When the cream starts to thicken, add the vanilla and cornstarch to the mixture, beating until semi-stiff peaks form. This is when you lift some whipped cream and it comes to a sharp peak that then flops over slightly. Optionally, add about 1/8 tsp. of blue gel food dye to the cream as you whip it to make blue whipped cream. (As opposed to me who made a blueberry syrup which I didn't end up feeling very fond of.)
- Fill a piping bag with the whipped cream, pipe several stars onto the cheesecake using a large star tip. Hold the piping bag vertically, about ¼-inch from the surface, squeezing for the count of three, then pull up sharply. You could also use a smaller star tip and make rosettes. Strategically pile your berries amongst the whipped cream. Repeat until you are satisfied with this beautiful cake.
This recipe for Patriotic Cheesecake Tart has a few steps and parts, but it is easy to make and looks gorgeous, no matter how you decorate it. Change things up by using different colors for the tart shell and different fruits for the topping. What foods do make to celebrate patriotic holidays? Share your favorite celebratory BBQ recipes and photos on our social pages like Facebook and Instagram, using the hashtags #NapoleonEats and #NapoleonGrills.
Happy Grilling!
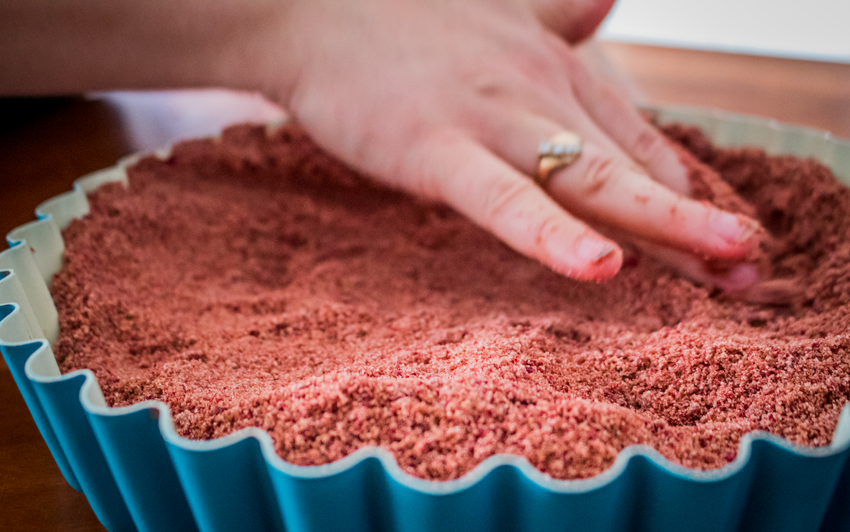
Once you've combined the butter with flour and sugar, press it into a tart pan
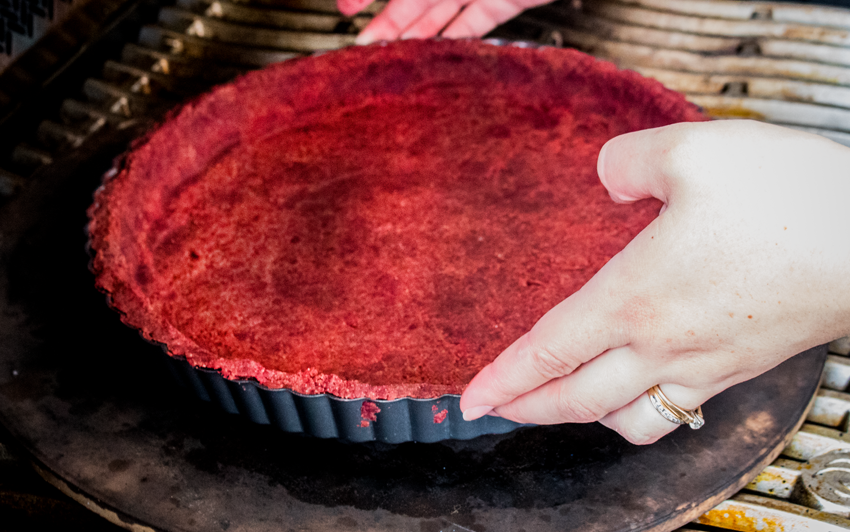
Bake the crust for up to 15 mins, then cool the crust
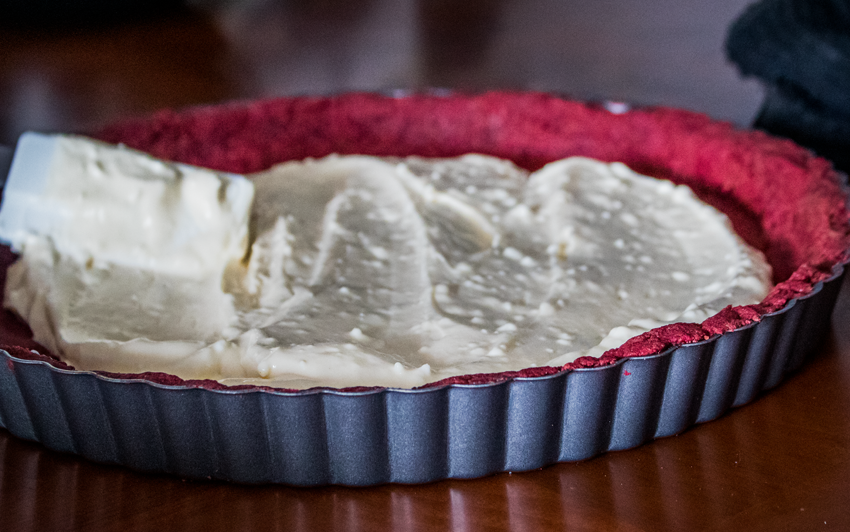
Spread the cheesecake mixture into the cooled tart shell
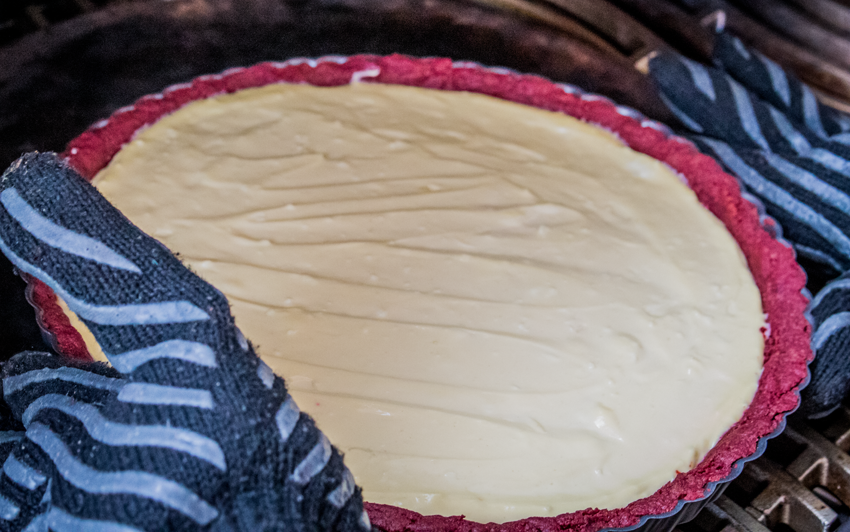
Bake the cheesecake filled tart for up to 35 mins until the edges are cooked, but the center is a little jiggly still
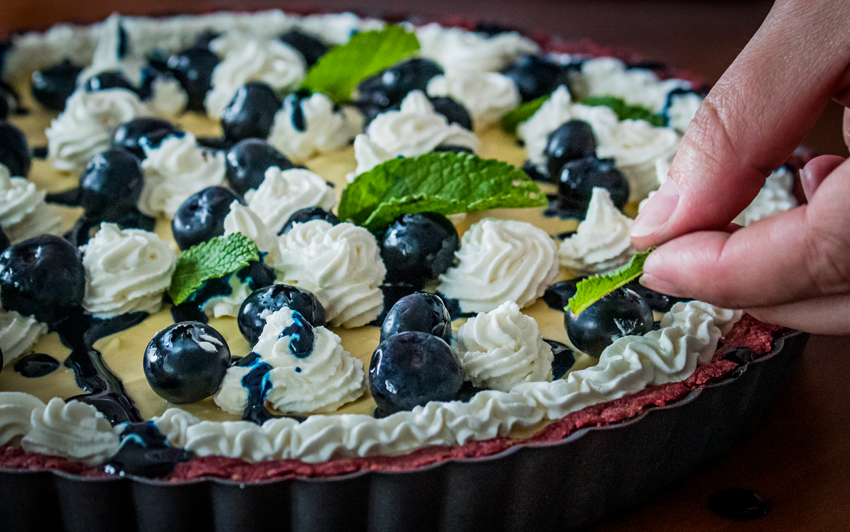
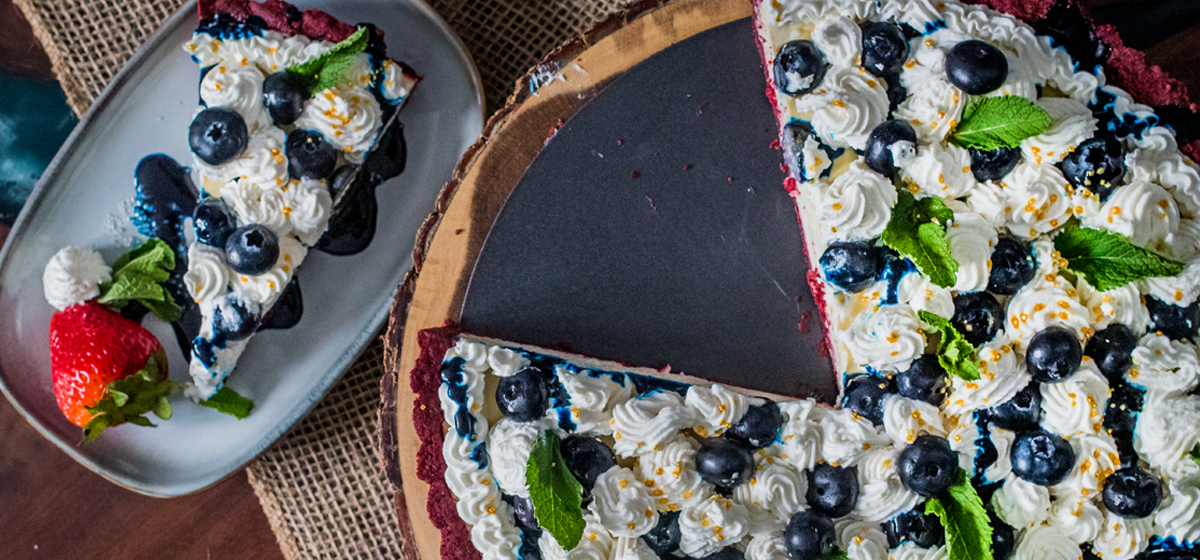
Decorate with stabilized whipped cream and fresh seasonal berries

Serve chilled
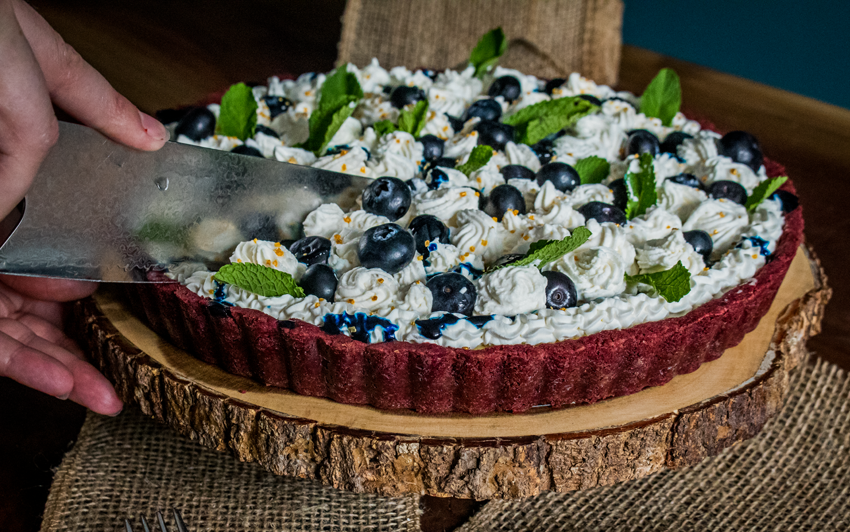
Use a hot knife to cut the cake, this will ensure clean slices
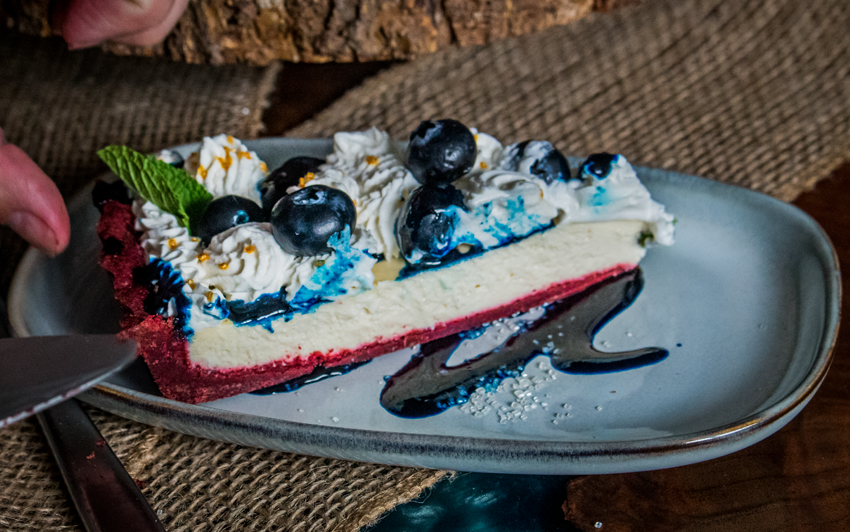
Serve with blueberry syrup, more fresh berries and fresh mint leaves
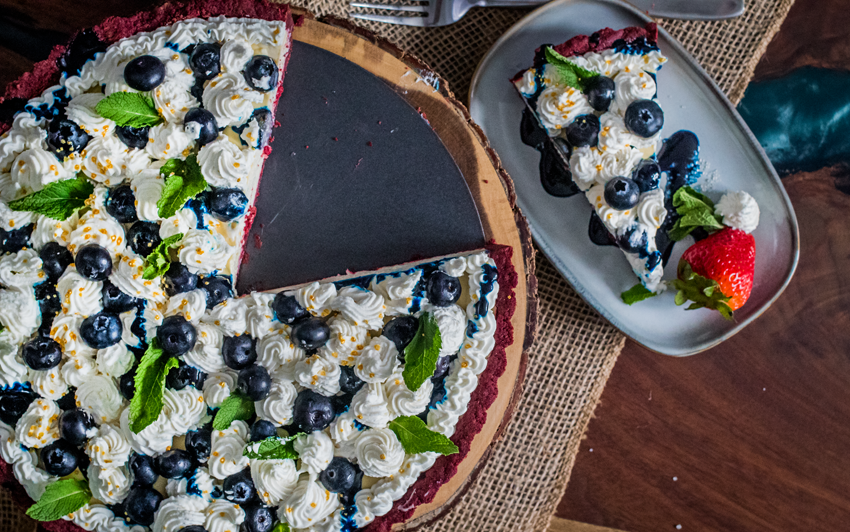
So beautiful and patriotic

I used to be the Sultana of Sizzle, but you can call me Andrea. I have always been passionate about food. Even though I was majoring in Art and Graphic Design, I would frequently be found cooking for my friends and family.
Search Recipes

There are many odd strings of keywords that can find their way into a search engine. Some may not think to put “barbecue recipe for Mother’s Day brunch” in a search bar.
Once you've combined the butter with flour and sugar, press it into a tart pan
Bake the crust for up to 15 mins, then cool the crust
Spread the cheesecake mixture into the cooled tart shell
Bake the cheesecake filled tart for up to 35 mins until the edges are cooked, but the center is a little jiggly still
Decorate with stabilized whipped cream and fresh seasonal berries
Serve chilled
Use a hot knife to cut the cake, this will ensure clean slices
Serve with blueberry syrup, more fresh berries and fresh mint leaves
So beautiful and patriotic